| System Management Services (SMS) 1.2 Installation Guide and Release Notes |
|
| System Management Services (SMS) 1.2 Installation Guide and Release Notes |
|
| C H A P T E R 1 |
SMS 1.2 on the Sun Fire 15K Server Systems |
This chapter contains reinstallation and upgrade instructions for System Management Services 1.2 software under the Solaris 9 operating environment. These instructions apply to the Sun Fire 15K server systems.
The SMS reinstall and upgrade setup focuses on setting up group IDs used for credential checking, and setting up and running control scripts that start SMS when the Solaris operating environment boots.
To Configure the Management Network (MAN) Using smsconfig(1M)
To Set up the Network Install Server on the System Controller
To Set Up OpenBoot PROM Environment Variables for the Domain
SMS 1.2 first became available on Solaris 8 02/02. That version (SMS 1.2_s8) will not run on Solaris 9 05/02. This version of SMS 1.2 (SMS 1.2_s9) will not run on Solaris 8 02/02.
The SMS packages use approximately 18GBytes each of disk space on two disks on the server. The following table lists the total size of the SMS software by partition.
SMS requires two drive partitions with at least 10 Mbytes be dedicated to each metadevice state database copy.
The following sections contain overviews of the reinstallation and upgrade process, which require you to use sections from different publications and files. You should ensure that you have the following publications and printouts before you start the reinstallation or upgrade.
Solaris 9 Installation Guide
Sun Fire
 15K System Site Planning Guide
Refer to the Sun Fire 15K Site Planning Guide when reconfiguring your MAN network.
A copy of your /etc/group file.
Print a copy of your /etc/group file to refer to when repopulating your user groups. This file is not restored during a reinstallation or upgrade and must be recreated. Disregard if you will be changing user group memberships.
Check the Solaris 9 (SPARC Platform Edition) Release Notes , the Solaris 9 Release Notes Supplement for Sun Hardware and www.sunsolve.com for the latest information on issues, late-breaking news and patch availability.
|
Note Note - You must run the same version of SMS on both SCs. |
|
Note Note - Any patches to the Solaris operating system should be applied before re-installing SMS software. |
For the examples in this guide:
Your Sun Fire 15K system is preinstalled with SMS 1.2 for Solaris 9 (SMS 1.2_s9) software when you receive it. The reinstallation instructions in this section assume that your system is already running the Solaris 9 05/02 operating environment.
To reinstall SMS software you will need to perform the following procedures:
Download your SMS 1.2_s9 packages. See To Download Software From the Web or To Download Software From a CD-ROM .
Backup SMS software. See Backing Up Your SMS Environment .
Turn off failover on the main SC (SC0).
Install SMS 1.2_s9 software packages on the spare SC (SC1). See To Install SMS Packages Using Web Start or To Manually Install the SMS Software Packages .
Restore your SMS 1.2 configuration on the spare SC. Restoring Your SMS Configuration on the Spare SC .
Configure the MAN network on the spare SC. Configuring the MAN Network on the Spare SC .
Configure your SMS user groups on the spare SC. See Adding Users to SMS .
Switch control to the spare SC. See Switch Control to the Spare SC .
Reinstalling the Former Main SC. See Reinstalling or Upgrading the Former Main SC .
Backup the current SMS software using smsbackup on the former main SC (SC0).
Restore your SMS 1.2 configuration on the former main SC (SC0). See Restore your SMS configuration on the former main SC. .
Configure the MAN network on the former main SC. See Configuring the MAN Network on the Former Main SC .
Configure your SMS user groups for the former main SC. See Adding Users to SMS .
Reboot the former main (SC0). See Reboot the Former Main SC .
Turn on failover on the new main SC (SC1). See Enabling Failover on the Main SC (SC1) .
To begin reinstallation proceed to Downloading SMS Software .
The following table contains a high level overview of the possible SMS software combinations on a single SC and their upgrade paths:
|
Backup your SMS 1.1 configuration |
|||
To fresh install the Solaris 9 operating environment with SMS 1.2_s9 software from Solaris 8 with SMS 1.1 or 1.2_s8 software; or to upgrade from Solaris 8 with SMS 1.2 software, you will be performing the following procedures:
Download your SMS 1.2_s9 packages. See To Download Software From the Web or To Download Software From a CD-ROM .
Backup SMS software. See Backing Up Your SMS Environment .
Turn off failover on the main SC (SC0).
Fresh Install or upgrade your Solaris operating environment on the spare SC.
Refer to the Solaris 9 Installation Guide for detailed installation instructions.
Install SMS 1.2_s9 software packages on the spare SC (SC1). See To Install SMS Packages Using Web Start or To Manually Install the SMS Software Packages .
Restore your SMS 1.1 or SMS 1.2 configuration on the spare SC. See Restoring Your SMS Configuration on the Spare SC .
Configure the MAN network on the spare SC. See Configuring the MAN Network on the Spare SC .
Configure your SMS user groups for the spare SC (SC1). See Adding Users to SMS .
Switch control to the spare SC. See Switch Control to the Spare SC .
Update the SC and CPU flash PROMs on the new main SC. See Updating the Flash PROMs on the Spare SC and the System Boards .
Reinstall or upgrade the former main SC (SC0). See Reinstalling or Upgrading the Former Main SC .
Backup the current SMS software using smsbackup on the former main SC (SC0).
Fresh install or upgrade your Solaris operating environment on the former main SC (SC0). Refer to the Solaris 9 Installation Guide for detailed installation instructions.
Install SMS 1.2_s9 software packages on the former main SC (SC0).
Restore your SMS 1.1 or SMS 1.2 configuration on the former main SC (SC0). See Restore your SMS configuration on the former main SC. .
Configure the MAN network on the former main. See Configuring the MAN Network on the Former Main SC .
Configure your SMS user groups for the former main SC. See Adding Users to SMS .
Reboot the former main (SC0). See Reboot the Former Main SC .
Update the SC flash PROMs on the former main SC. See Updating the Flash PROMs on the Former Main SC .
Turn on failover on the new main SC (SC1). See Enabling Failover on the Main SC (SC1) .
To begin Type 1 upgrade proceed to Downloading SMS Software .
To upgrade from the Solaris 8 and SMS 1.1 software to the Solaris 9 operating environment and SMS 1.2 software, perform the following procedures:
Download your SMS 1.2_s9 packages. See To Download Software From the Web or To Download Software From a CD-ROM .
Backup SMS software. See Backing Up Your SMS Environment .
Turn off failover on the main SC (SC0).
Install SMS 1.2_s9 software packages on the spare SC (SC1). See To Install SMS Packages Using Web Start or To Manually Install the SMS Software Packages .
Restore your SMS 1.1 configuration. See Restoring Your SMS Configuration on the Spare SC .
Switch versions from SMS 1.1 to SMS 1.2 on the spare SC (SC1).
Configure the MAN network on the spare SC (SC1). See Configuring the MAN Network on the Spare SC .
Configure your SMS user groups for the spare SC (SC1). See Adding Users to SMS .
Upgrade your Solaris 9 operating environment. Refer to the Solaris 9 Installation Guide for detailed installation instructions.
Switch control to the spare SC. See Switch Control to the Spare SC .
Update the SC and CPU flash PROMs on the new main SC. See Updating the Flash PROMs on the Spare SC and the System Boards .
Reinstalling the Former Main SC. See Reinstalling or Upgrading the Former Main SC .
Backup the current SMS software using smsbackup on the former main SC (SC0).
Install SMS 1.2_s9 software packages on the former main SC (SC0).
Restore your SMS 1.1 configuration on the former main SC. See Restoring Your SMS Configuration on the Former Main SC .
Switch versions from SMS 1.1 to SMS 1.2 on the former main SC.
Restore your SMS 1.1 configuration on the former main SC (SC0).
Configure the MAN network on the former main SC (SC0). See Configuring the MAN Network on the Former Main SC
Configure your SMS user groups for the former main SC (SC0). See Adding Users to SMS .
Upgrade your Solaris 9 operating environment. Refer to the Solaris 9 Installation Guide for detailed installation instructions.
Reboot the former main (SC0). Reboot the Former Main SC .
Update the flash PROMs on the main SC (SC0). See Updating the Flash PROMs on the Former Main SC .
Turn on failover on the main (SC0). See Enabling Failover on the Main SC (SC1) .
To begin Type 2 upgrade proceed to Downloading SMS Software .
You can retrieve SMS software from either the web or on the Sun Computer Systems Supplement CD.
1. Using your web browser, go to http://www.sun.com/servers/sw/
2. Click the System Management Services (SMS) link.
3. Click the Click here to download link.
The file that is then downloaded is named sms_1_2_sparc.zip .
4. Log in to the SC as superuser.
5. Change directory to the location where you downloaded the software:
6. Extract the downloaded file by typing:
The SMS 1.2 packages are located in / download_directory /sms_1_2_sparc/System_Management_Services_1.2/Product .
7. Proceed to Backing Up Your SMS Environment .
1. Insert the Software Supplement for the Solaris 9 05/02 Operating Environment CD-ROM into the CD-ROM drive.
Allow time for the Volume Manager to mount the CD-ROM.
The SMS 1.2 packages are located in /cdrom/cdrom0/System_Management_Services_1.2/Product .
2. Log in to the system controller as superuser.
3. Change to the Product installation directory:
4. Proceed to Backing Up Your SMS Environment .
If this SC has a working SMS environment, you should do the following before attempting to reinstall the SMS software:
1. Make certain your configuration is stable.
Being stable means no commands are running and no hardware is changed during the reinstallation or upgrade process.
2. Log in to the main SC as a user with platadmn privileges.
1. Log in to the spare as superuser.
2. Stop SMS on the spare SC (SC1):
3. Backup the system on the spare SC.
Run smsbackup before proceeding or have the latest copy of the smsbackup file ( sms_backup.X.X.cpio ) accessible to the disk.
directory_name is the name of the directory in which the backup file is created. The directory_name requires the absolute path name for the file. This file can reside in any directory on the system, connected network or tape device to which you have read/write privileges. If no directory_name is specified, a backup file is created in /var/tmp .
The directory_name specified must be mounted on as a UFS file system. Specifying a TMPFS file system, such as /tmp , will cause smsbackup to fail. If you are not certain that your directory_name is mounted as a UFS file system, type:
A UFS file system will return directory information. Any other type of file system will return a warning.
|
Note Note - Do this now only if you are performing a Type 1 installation. Otherwise proceed to Installing SMS Packages. |
1. Install or upgrade the Solaris 9 operating environment according to the Solaris installation instructions. Refer to the Solaris 9 (SPARC Platform Edition) Installation Guide for detailed installation instructions.
The instructions in the following sections assume that your system is running the Entire Distribution software group (or higher) of the Solaris 9 05/02 operating environment. SMS 1.2_s9 does not run under software releases earlier than Solaris 9 05/02 or software groups less than Entire Distribution . Any relevant patches should be applied according to each patch's instructions.
2. Once your operating environment has been successfully installed proceed to Installing SMS Packages .
To install SMS software packages, follow the steps in the procedure To Install SMS Packages Using Web Start or To Manually Install the SMS Software Packages .
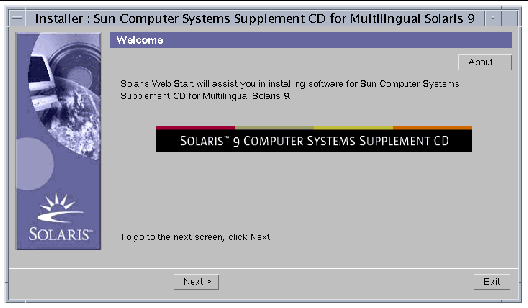
You can use Web Start to perform a reinstall from the web or CD-ROM.
1. Log in to the spare SC as superuser.
2. Set the DISPLAY environment variable to your current host.
hostname is the host name of the machine used to graphically display Web Start.
hostname is the host name of the machine used to graphically display Web Start.
3. Change directory to the location of the SMS 1.2 package:
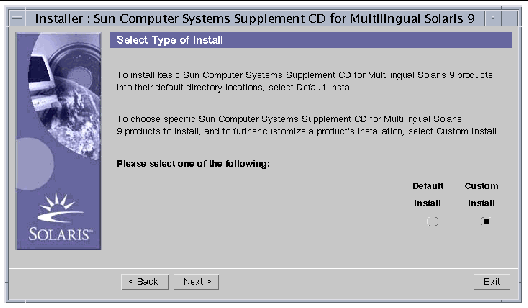
The Select Type of Install dialog box appears:
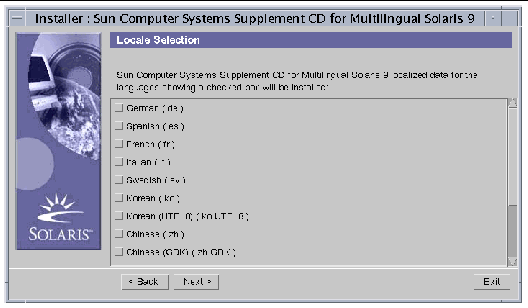
The Locale dialog box appears:
English is the default, there is no box to check. Click on next.
With custom installation, only the products that you select are installed.
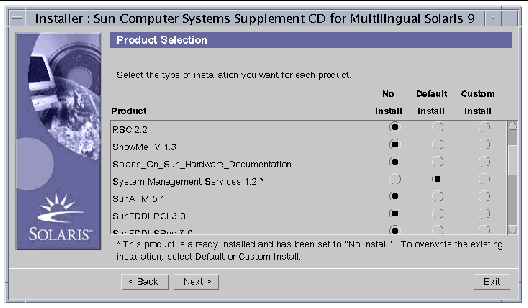
The Product Selection dialog box appears:
Make sure all products but SMS are set to No Install. Choose Default Install for SMS.
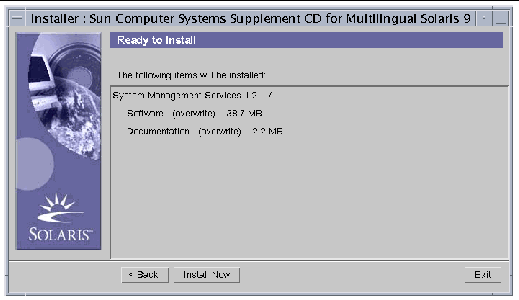
The Ready to Install dialog box appears:
10. Verify that you have sufficient disk space to cover the requirements displayed on the Ready to Install dialog box.
|
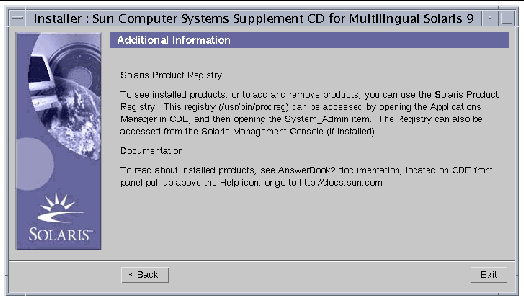
Note Note - Web Start automatically installs the online System Management Services (SMS) Reference Manual (man) pages in /opt/SUNWSMS/man/sman1m. To avoid conflicts, do not change this location. |
11. Click the Install Now button.
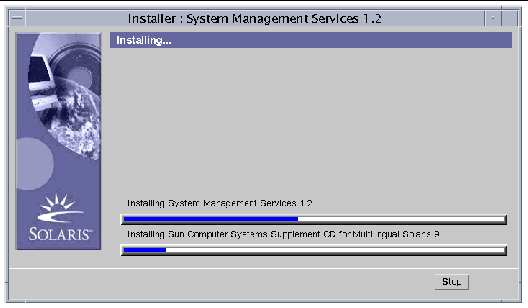
The Installing screen appears:
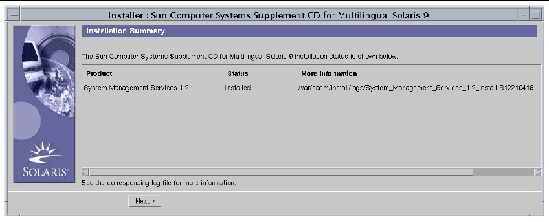
Wait until the installation is complete and the Installation Summary dialog box is displayed.
The Additional Information dialog box appears:
14. Proceed to To Restore Your SMS Configuration .
1. Log in to the spare SC as superuser.
2. Change directory to the location of the SMS 1.2 package:
If you downloaded software from the Web, type:
If you are installing software from the CD-ROM; place the Solaris 9 05/02 Supplemental CD into the SC0 CD-ROM drive and type:
 |
Caution 3. It is extremely important that you install the SUNSMSr package first and then the SUNWSMSop package second. All other packages can be installed in any convenient order after the first two. |
4. Add packages using the pkgadd (1M) command.
The system displays the list of available packages.
5. Enter the list of package numbers that you want to install, separated by commas.
In this example, 11 and 7 are SUNSMSr and SUNWSMSop respectively and must be listed first and second.
Select package(s) you wish to process (or `all' to process all packages). (default: all) [?,??,q]: 11,7,1-6,8-10,12-15 |
6. Answer y (yes) to all package installation queries.
7. Verify that all the packages were completely installed.
8. (Optional) List the names of any packages that are partially installed.
If any packages are listed, remove and reinstall them. If this does not correct the problem, contact your Sun service representative.
9. You have completed the manual installation of software packages.
10. Proceed to To Restore Your SMS Configuration .
1. Restore your SMS configuration.
For Reinstallation or Type 1 installation:
Run smsrestore to restore the smsbackup file, then proceed to To Configure the Management Network (MAN) Using smsconfig(1M) .
filename is the absolute path to the backup file that was created by smsbackup (1M). The filename must contain the full path name for the file. This file can reside anywhere on the system, connected network or tape device. If no filename is specified, you will receive an error.
|
Note Note - Once smsrestore completes you will see the following message: "Please set the desired SMS failover state." Ignore this message. |
Run smsversion then smsrestore .
filename is the absolute path to the backup file that was created by smsbackup (1M). The filename must contain the full path name for the file. This file can reside anywhere on the system, connected network or tape device. If no filename is specified, you will receive an error.
|
Note Note - Once smsrestore completes you will see the following message: "Please set the desired SMS failover state." Ignore this message. |
2. Proceed to To Configure the Management Network (MAN) Using smsconfig(1M) .
|
|
To correctly configure the management network, you need to do the following:
1. Be sure you have read and filled out the information in the
Sun Fire
15K System Site Planning Guide
.
|
Note Note - A domain can be excluded from the I1 network configuration by using the word NONE as the net_id. This applies only to the I1 network. |
2. Read the smsconfig (1M) man page.
3. Log into the spare SC as superuser.
4. To display, review, or change the Management Network settings, type:
5. Answer the questions based on the information gathered for your site in the
Sun Fire
15K System Site Planning Guide
.
The following example shows IPv4 and accepts the default settings provided with the Solaris 9 05/02 Supplemental CD. An IPv6 network example differs slightly. There will be no prompts for netmasks and /etc/ipnodes will be modified in addition to /etc/hosts .
For more information on smsconfig -m refer to the "MAN Configuration" section of the System Management Services (SMS) 1.2 Administrator Guide and the smsconfig man page.
|
Note Note - Any changes made to the network configuration on one SC using smsconfig -m must be made to the other SC as well. Network configuration is not automatically propagated. |
6. Configure the Name Services for SMS
7. Log in to the SC as superuser.
8. Edit the /etc/nsswitch.conf file.
a. The first entry for password , group , hosts , netmasks and ethers should be files . List other naming services in use, such as nis or DNS , next.
The following example shows the correct partial contents of an /etc/nsswitch.conf file on the spare SC. The look-up order for the database entries is first files then naming services.
sc1: # vi /etc/nsswitch.conf ... passwd: files nis group: files nis ... hosts: files nis ... netmasks: files nis ... ethers: files nis ... |
|
Note Note - smsconfig automatically updates the /etc/netmasks and the /etc/inet/hosts file with all the private host names and logical addresses for the SC. |
9. Update your Solaris Naming software (NIS, NIS+, DNS, etc), as appropriate.
10. Apply any relevant patches, unless otherwise noted in the patch instructions.
See Patches . If no patches are needed you can proceed to Step 11 .
11. Configure SMS groups. See
To Add Users to SMS Groups and Configure Directory Access
.
|
Note Note - In order to correctly set the ACLs you must repopulate the user groups using smsconfig -a. Manually editing or copying over an old /etc/group can limit or deny access to users. |
12. After adding users to your SMS Groups:
If you are performing a reinstallation or Type 1 installation, proceed to To Switch Control to the Spare SC .
If you are performing a Type 2 installation, proceed to To Upgrade the Solaris Operating Environment .
|
Note Note - Do this now only if you are performing a Type 2 installation. Otherwise proceed to Installing SMS Packages. |
1. Install or upgrade the Solaris 9 operating environment according to the Solaris installation instructions. Refer to the Solaris 9 Installation Guide for detailed installation instructions.
The instructions in the following sections assume that your system is running the Entire Distribution software group (or higher) of the Solaris 9 05/02 operating environment. SMS 1.2_s9 does not run under software releases earlier than Solaris 9 05/02 or software groups less than Entire Distribution . Any relevant patches should be applied according to each patch's instructions.
2. Once your operating environment has been successfully installed proceed to To Switch Control to the Spare SC .
1. Log in to the main SC (SC0) as superuser.
3. Log in to the spare SC (SC1) and drop to the OpenBoot PROM prompt.
You must reboot the SC in order for the changes to take effect. Once you have rebooted the system, network configuration is complete and SMS will start and SC1 will become the main SC.
For reinstallation, proceed to To Reinstall or Upgrade the Former Main SC .
For Type 1 and Type 2 installations, Proceed to To Update the Flash PROMs .
When you upgrade the SMS software you must update the SC flash PROMs on both SCs. You must also update the CPU flash PROMs on the system boards. Updating the flash PROMs should be done as soon as you have created system privileges. You must have platform privileges to run the flashupdate (1M) command.
Updating flash PROMs is not necessary for software reinstallation.
|
Note Note - In order to update your SC PROMs you must have access to the following drivers: |
|
Note Note - If the drivers are not available you must run the following command as superuser on each SC: |
1. Log in to the new main SC as a user with platadmn privileges.
2. Upgrade the SC Flash PROMs.
Update the SC PROMs using flashupdate .
sc1:sms-user:> flashupdate -f /opt/SUNWSMS/firmware/SCOBPimg.di scx/fp0 sc1:sms-user:> flashupdate -f /opt/SUNWSMS/firmware/SSCPOST.di scx/fp1 |
x is the number of the current main SC (0|1).
For more information on flashupdate (1M) refer to the System Management Services (SMS) 1.2 Reference Manual or the flashupdate man page.
3. Upgrade the CPU Flash PROMs.
Update all CPU Flash PROMs using flashupdate .
For more information on flashupdate (1M) refer to the System Management Services (SMS) 1.2 Reference Manual or the flashupdate man page.
4. Drop to the OpenBoot PROM prompt.
6. Proceed to To Reinstall or Upgrade the Former Main SC .
1. Log in to the former main as superuser.
2. Backup the system on the former main SC (SC0).
Run smsbackup before proceeding or have the latest copy of the smsbackup file ( sms_backup.X.X.cpio ) accessible to the disk.
directory_name is the name of the directory in which the backup file is created. The directory_name requires the absolute path name for the file. This file can reside in any directory on the system, connected network or tape device to which you have read/write privileges. If no directory_name is specified, a backup file is created in /var/tmp .
The directory_name specified must be mounted on as a UFS file system. Specifying a TMPFS file system, such as /tmp , will cause smsbackup to fail. If you are not certain that your directory_name is mounted as a UFS file system, type:
A UFS file system will return directory information. Any other type of file system will return a warning.
For Type 1 installations, proceed to Type 1 Installation or Upgrade of the Solaris Operating Environment on the Spare SC .
For reinstallation or Type 2 installation, proceed to Installing SMS 1.2 Software on the Former Main SC .
|
Note Note - Do this now only if you are performing a Type 1 installation. Otherwise proceed to Installing SMS 1.2 Software on the Former Main SC. |
1. Install or upgrade the Solaris 9 operating environment according to the Solaris installation instructions. Refer to the Solaris 9 Installation Guide for detailed installation instructions.
The instructions in the following sections assume that your system is running the Entire Distribution software group (or higher) of the Solaris 9 05/02 operating environment. SMS 1.2_s9 does not run under software releases earlier than Solaris 9 05/02 or software groups less than Entire Distribution . Any relevant patches should be applied according to each patch's instructions.
2. Once your operating environment has been successfully installed proceed to To Install SMS 1.2 Software .
1. Install the SMS software packages on the former main SC (SC0) using Web Start or CD-ROM.
To install the SMS software packages on the former main SC, see To Install SMS Packages Using Web Start or To Manually Install the SMS Software Packages and substitute the main SC wherever you see the spare SC.
To mount the CD-ROM on the spare SC, see To Share SMS Packages on the Spare SC to the Main SC .
When you have successfully exited Web Start or completed the manual installation of all the packages proceed to To Restore Your SMS Configuration .
1. Restore your SMS configuration on the former main SC.
For reinstallation and Type 1 installations:
filename is the absolute path to the backup file that was created by smsbackup (1M). The filename must contain the full path name for the file. This file can reside anywhere on the system, connected network or tape device. If no filename is specified, you will receive an error.
|
Note Note - Once smsrestore completes you will see the following message: "Please set the desired SMS failover state." Ignore this message. |
Run smsversion then smsrestore .
filename is the absolute path to the backup file that was created by smsbackup (1M). The filename must contain the full path name for the file. This file can reside anywhere on the system, connected network or tape device. If no filename is specified, you will receive an error.
|
Note Note - Once smsrestore completes you will see the following message: "Please set the desired SMS failover state." Ignore this message. |
2. Proceed to To Configure the Management Network (MAN) Using smsconfig(1M) .
|
|
To correctly configure the management network, you need to do the following:
1. Be sure you have read and filled out the information in the
Sun Fire
15K System Site Planning Guide
.
|
Note Note - A domain can be excluded from the I1 network configuration by using the word NONE as the net_id. This applies only to the I1 network. |
2. Read the smsconfig (1M) man page.
3. Log into the former main SC as superuser.
4. To display, review, or change the Management Network settings, type:
5. Answer the questions based on the information gathered for your site in the
Sun Fire
15K System Site Planning Guide
.
The following example shows IPv4 and accepts the default settings provided with the Solaris 9 05/02 Supplemental CD. An IPv6 network example differs slightly. There will be no prompts for netmasks and /etc/ipnodes will be modified in addition to /etc/hosts .
For more information on smsconfig -m refer to "MAN Configuration section of the System Management Services (SMS) 1.2 Administrator Guide and the smsconfig man page.
6. Configure the Name Services for SMS
7. Log in to the SC as superuser.
8. Edit the /etc/nsswitch.conf file.
a. The first entry for password , group , hosts , netmasks and ethers should be files . List other naming services in use, such as nis or DNS , next.
The following example shows the correct partial contents of an /etc/nsswitch.conf file on the spare SC. The look-up order for the database entries is first files then naming services.
sc0: # vi /etc/nsswitch.conf ... passwd: files nis group: files nis ... hosts: files nis ... netmasks: files nis ... ethers: files nis ... |
|
Note Note - smsconfig automatically updates the /etc/netmasks and the /etc/inet/hosts file with all the private host names and logical addresses for the SC. |
9. Update your Solaris Naming software (NIS, NIS+, DNS, etc), as appropriate.
10. Apply any relevant patches, unless otherwise noted in the patch instructions.
See Patches . If no patches are needed you can proceed to Step 11 .
11. Configure SMS groups. See
To Add Users to SMS Groups and Configure Directory Access
.
|
Note Note - In order to correctly set the ACLs you must repopulate the user groups using smsconfig -a. Manually editing or copying over an old /etc/group can limit or deny access to users. |
12. After adding users to your SMS Groups:
For reinstallation and Type 1 installations, proceed to To Reboot the Former Main SC .
For Type 2 installations, proceed to To Upgrade the Solaris Operating Environment .
|
Note Note - Do this now only if you are performing a Type 2 installation. Otherwise proceed to Installing SMS Packages. |
1. Upgrade the Solaris 9 operating environment according to the Solaris installation instructions. Refer to the Solaris 9 Installation Guide for detailed installation instructions.
The instructions in the following sections assume that your system is running the Entire Distribution software group (or higher) of the Solaris 9 05/02 operating environment. SMS 1.2_s9 does not run under software releases earlier than Solaris 9 05/02 or software groups less than Entire Distribution . Any relevant patches should be applied according to each patch's instructions.
2. Proceed to Reboot the Former Main SC .
1. Log in to the main SC (SC0) as superuser.
2. Log in to the former main SC (SC0) and drop to the OpenBoot PROM prompt.
You must reboot the SC in order for the changes to take effect. Once you have rebooted the system, network configuration is complete.
For reinstallation, proceed to To Enable Failover .
For Type 1 and Type 2 installations, Proceed to To Update the Flash PROMs .
When you upgrade the SMS software you must update the SC flash PROMs on both SCs. This is not necessary for software reinstallation.
|
Note Note - You do not need to update the CPU flash PROMs. This was done earlier and is not repeated. |
Updating the SC flash PROMs should be done as soon as you have created system privileges. You must have platform privileges to run the flashupdate (1M) command.
|
Note Note - In order to update your SC PROMs you must have access to the following drivers: |
|
Note Note - If the drivers are not available you must run the following command as superuser on each SC: |
1. Log in to the main SC as a user with platadmn privileges.
2. Upgrade the SC Flash PROMs.
Update the SC PROMs using flashupdate .
sc0:sms-user:> flashupdate -f /opt/SUNWSMS/firmware/SCOBPimg.di scx/fp0 sc0:sms-user:> flashupdate -f /opt/SUNWSMS/firmware/SSCPOST.di scx/fp1 |
x is the number of the current main SC (0|1).
For more information on flashupdate (1M) refer to the System Management Services (SMS) 1.2 Reference Manual or the flashupdate man page.
3. Drop to the OpenBoot PROM prompt.
4. Reboot the main SC (SC0). Type:
5. Proceed to To Enable Failover .
1. Login in the new main SC (SC1) as a user with platadmn privileges.
Your reinstallation or upgrade is now complete! You are now ready to proceed to Creating a Domain .
The SMS security model uses group membership to provide users with the authority to perform various system management tasks. The level and type of system management available depends on a user's group membership. For more information, refer to Chapter 2, "SMS Security" in the System Management Services (SMS) 1.2 Administrator Guide .
|
Note Note - Adding users using smsconfig must be performed on both the main and spare SCs once software installation and network configuration are completed. |
The SMS user group IDs are created during initial installation. The following table lists the user groups that are set up for you:
SMS provides the ability to add users to SMS groups and refine user access to directories on the Sun Fire 15K. This functionality protects domain integrity and system security.
2. To correctly configure SMS groups and administrative privileges, you must use the following command for each user you wish to add.
username is the name of a user account on the system.
groupname is one of the following valid group designations: admn , rcfg , oper or svc .
domain_id is the ID for a domain. Valid domain_id s are A through R and are case insensitive.
For example, to add a user to the dmnaadmn group with access to domain a directories, type:
sc0: # /opt/SUNWSMS/bin/smsconfig -a -u fdjones -G admn a fdjones has been added to the dmnaadmn group All privileges to domain a have been applied. |
|
Note Note - Do not manually add or remove users from SMS groups in the /etc/group file. This can limit or deny access to users. |
3. To list SMS groups and administrative privileges, use the following command.
For example, to display all users with platform privileges, type:
4. To correctly configure SMS groups and administrative privileges, you must use the following command for each user you wish to remove.
For example, to remove fdjones from the dmnbadmn group, type:
sc0: # /opt/SUNWSMS/bin/smsconfig -r -u fdjones -G admn B fdjones has been removed from the dmnbadmn group. All access to domain B is now denied. |
username is the name of a valid user account on the system.
groupname is one of the following group designations: admn , rcfg , oper or svc .
domain_id is the ID for a domain. Valid domain_id s are A through R and are case insensitive.
|
Note Note - Do not manually add or remove users from SMS groups in the /etc/group file. This can limit or deny access to users. |
5. You have successfully configured your SMS user groups.
This section describes the following procedures for creating a new domain:
For the examples in this guide:
The privileges allotted to the user are determined by the platform or domain groups to which the user belongs. In these examples, the sms-user is assumed to have both platform and domain administrator privileges, unless otherwise noted.
1. Log in as a user with platadmn privileges, and create a domain by adding boards.
domain_id is the ID of the domain ( A through R ) that you are creating
board_id corresponds to board location. The following board_id forms are accepted:
For example, the following command adds CPU boards in slots 4, 12, and 15 to domain A.
The next example adds I/O boards in slots 3, 12, and 17 to domain A.
2. Use the deleteboard (1M) command if you need to remove boards from an inactive domain
location is the board location. The following location forms are accepted:
For example, the following command removes the CPU board in slot 12 of slot 0 from domain A.
The next example removes an I/O board in slot 3 of slot 1 from domain A.
domain_id is the ID of the domain ( A through R ) you are creating.
domain_tag is the name of the new tag you are adding for the domain, such as domainA .
For example, the following command adds the tag for domain A to the platform configuration database (PCD).
4. Use the deletetag (1M) command if you want to remove a tag.
domain_id is the ID of the domain from which you want to remove a tag ( A through R ).
For example, the following command deletes the tag for domain A from the platform configuration database (PCD).
SMS contains a virtual key switch for each domain, which controls the states of the domain. The showkeyswitch (1M) command displays the position of the virtual key switch, and the setkeyswitch (1M) command changes the position of the virtual key switch. The valid positions of the virtual key switch are on , standby , off , diag , and secure . For more information refer to the System Management Services (SMS) 1.2 Reference Manual .
domain_id is the ID of the domain ( A through R ) for which you want to check status.
For example, the following command shows the status of domain A .
2. Activate the domain as a user with Domain Administrator ( dmnaadmn ) privileges.
domain_id is the ID of the domain ( A through R ) you want to activate
position is whether you want the virtual keyswitch in the on (activate), off (deactivate), standby , diag , or secure position.
For example, the following command activates domain A .
3. If you need to deactivate a domain, set the position of the virtual keyswitch to off .
The conditions required for network console are as follows:
The network was properly installed and configured on both the SC and the domain in question using the
Sun Fire
15K System Site Planning Guide
and
smsconfig
.
A network connection exists between the SC and the domain in question.
IPSec configuration on both SC and the domain in question were properly installed and configured using smsconfig . For more information on IPSec, see the kmd (1M) man page and Chapter 3 in the System Management Services (SMS) 1.2 Administrator Guide .
1. Bring up an active console window for the domain
domain_id is the ID of the domain ( A through R ) for which you want to bring up a console.
For example, the following command brings up a console for domain A .
In the domain console window, vi (1) runs properly and the escape sequences ( tilde commands) work as intended only if the environment variable TERM has the same setting as that of the console window.
For more information on domain console refer to the System Management Services (SMS) 1.2 Administrator Guide and the console man page.
This section describes the following procedures for setting up and installing the Solaris operating environment for the domain:
|
Note Note - If you had the Solaris operating environment pre-installed on your system or you have run the sys-unconfig command on the domain please see Unconfigured Domains before proceeding. |
|
|
You must create an install server to install the Solaris operating environment software for a domain over the network.
1. You should be familiar with setting up network install servers before beginning this procedure.
For information on configuring network install servers, refer to the Solaris 9 Installation Guide .
Refer to the Solaris 9 Installation Guide for information on setting up the spare SC as an install client.
For partition and Solaris operating system distribution information see Introduction .
After you have created an install server on sc0, you are ready to install the Solaris operating environment software for the domain over the network. The system needs to identify the name of the domain, and you add this information by using the add_install_client (1M) command. Refer to the Solaris 9 05/02 Reference Manual for more information about the add_install_client (1M) command.
1. Obtain the MAN network Ethernet address at the OpenBoot PROM prompt by typing:
2. As superuser on SC0, set up the host domain as an install client.
sc0: # /install_dir_path/Solaris_9/Tools/add_install_client -e domain_man_etheraddr -s scI1_hostname:/install_dir_path -c scI1_hostname:/install_dir_path domain_hostname sun4u |
install_dir_path specifies the directory where the CD images were copied.
domain_man_etheraddr is the Ethernet address for the domain.
scI1_hostname
is the hostname given to the SC I1 network during the
smsconfig -m
procedure.
domain_hostname is the name given to the domain I1 network interface assigned during the smsconfig -m procedure.
See "
To Configure the Management Network (MAN) Using smsconfig(1M)
." The domain host name was originally defined on the worksheet in the
Sun Fire
15K System Site Planning Guide
.
1. Display the functioning network interfaces.
If watch-net-all reports a failure on the device associated with man-net , you will need to contact your Sun representative.
2. Network boot the domain from the SC using the Management Network. Type:
3. Install the Solaris operating environment for the domain.
Refer to your
Sun Fire
15K System Site Planning Guide
for site specific and system dependent information when prompted during installation.
|
Note Note - To use dynamic reconfiguration (DR) you must install at least the Entire Distribution software group (or higher) of the Solaris 9 05/02 operating environment on the domain. |
4. Change the domain nodename.
When using the SC as an install server for a domain, change the domain's nodename after the installation is complete. This reduces the amount of network traffic generated between the domain and SC over the MAN network. Change the nodename of the domain to the hostname of one of its external network interfaces (for example, qfe0).
To change the domain's nodename do the following:
5. Remove the domain from the network install server list.
After installing the domain software, to remove the domain from the install server list:
Log in to the SC as superuser.
Type:
In preparation for Step 4 of the next procedure, note the physical disk location. For example, type:
sc0:#ls -la /dev/dsk/c0t17d0s0 lrwxrwxrwx 1 root root 77 Nov 20 17:38 /dev/dsk/c0t17d0s0 -> ../../devices/pci@3c,600000/pci@1/SUNW,qlc@4/fp@0,0/ssd@w21000020370dac0c,0:a |
Log out.
|
|
1. At the domain console's ok prompt, remove any duplicate entries in the devalias list.
duplicate_alias is the alias of the duplicate entry.
|
Note Note - This sequence must be repeated once per duplication. nvunalias removes only one device alias at a time; the last one in the list of device aliases. |
2. Display the OpenBoot PROM device tree to use in creating the device aliases.
3. Display the functioning network interfaces.
4. Set the bootdisk_alias so that it refers to the device on which you are installing the Solaris operating environment
bootdisk_alias is the alias for the device on which you are installing the Solaris operating environment
device_string is the string for the device on which you are installing the Solaris operating environment as displayed in Step 3.
|
Note Note - Enter the nvalias command on a single line. In the above example, the ssd in the physical disk location changed to disk in the boot string. |
5. Use the setenv command to set the default boot device to the correct alias.
bootdisk_alias is the user-defined alias you established in Step 5. The boot device must correspond to the a bootable disk on which you are installing the operating environment. This variable will be used in case of a panic and auto-boot. It is very important to set this variable correctly.
6. Now that you have set up an alias for your boot device, boot the disk by typing:
If you had the Solaris operating environment pre-installed on a domain or have run the sys-unconfig (1M) command on a domain, you must configure the MAN network information on that domain manually.
|
Note Note - Do not add the domain as an install client on the SC prior to booting the domain, as described in To Set Up the Domain as an Install Client. |
1. Log in to the domain as superuser.
The following is an example of the output displayed.
3. Add or edit a network-i1 entry to /etc/netmasks , using the following format:
4. Create an /etc/hostname.dman0 file with the following content:
5. Ensure that the 'manc_sc_ipaddr' IP address matches what's in /etc/syslog.conf:
If not, edit the /etc/syslog.conf file. Save and exit.
domain_id:# ifconfig dman0 plumb domain_id:# ifconfig dman0 manc_dom_ipaddr netmask + broadcast + private up |
manc_dom_ipaddr is the domain IP address listed in /etc/netmasks .
7. The domain is now configured.
If you need to apply a patch to SMS 1.2, disable failover before installing the patch.
SMS patches are available at: http://sunsolve.sun.com
Follow these guidelines and notify the affected administrators:
The system should be stable.
No DR operations should be in progress.
No domain bringup or shutdown should be in progress.
No user initiated datasync or cmdsync operations should be in progress.
Complete any domain, board, or configuration changes before you begin patch installation.
Please read all patch instructions carefully before attempting this procedure. Instructions in the patch procedure could preempt these instructions.
This example assumes the main SC is sc0 and the spare SC is sc1 .
1. Log in to the main SC as superuser.
2. Backup your system configuration on the main:
3. Log in to the main SC with platform administrator privileges.
4. Synchronize the main SC to the spare and backup to the spare. Type:
Wait until all files have been propagated.
5. Verify that all files have been propagated. Type:
When no files are listed in the queue, propagation is complete.
7. Patch sc0 (main) according to patch instructions.
8. Log in to the spare SC with platform administrator privileges.
11. Patch sc1 (spare) according to patch instructions.
13. You have finished the patch process for main and spare.
The additional software packages are in separate media. Install the software packages one at a time, from the appropriate media. There is no particular order in which the packages need to be installed. Following are additional packages that you may want to install:
Sun Remote Services (SRS)
Veritas Volume Manager (VM)
Load Sharing Facility (LSF) 3.2.3
Workshop 7
ClusterTools 3.1
C programming language and compiler
Fortran 77 programming language and compiler
Oracle database software
1. Log in to the SC as superuser.
2. Insert the appropriate installation CD into the CD-ROM drive on the SC.
3. Use the share (1M) command to share the CD across the network.
Add a CDROM entry to the /etc/dfs/dfstab file:
To propagate the CDROM image to NFS, type:
4. Log in to the domain as superuser.
5. Create and mount the /cdrom directory for the domain.
SC-I1: is the hostname specified for the SC I1 network in Step 5 of To Configure the Management Network (MAN) Using smsconfig(1M) .
6. Add the additional software package.
install_disk_name is the name of the installation disk from which you are installing.
software_package_name is the name of the software package you are adding.
The pkgadd (1M) command might display several messages and ask several installation questions for each package, some relating to space, others asking whether it is OK to continue. After answering these questions, and when asked whether to proceed, answer yes.
8. Log out of the domain and log in to the SC as superuser.
9. Eject the installation CD from the CD-ROM drive on the SC.
1. After you install any additional software packages, configure the ntp.conf file for each domain, to synchronize clocks between the SC and its domain.
For details on configuring the domain ntp.conf file, which resides at /etc/inet/ntp.conf , refer to the "Configuring NTP" section of the System Management Services (SMS) 1.2 Administrator Guide .
For more information about NTP commands, refer to the xntp (1M) man page in the man Pages(1M): System Administration Commands section of the Solaris 9 05/02 Reference Manual Collection.
For diagnostic or service reasons you may be asked to stop and restart SMS. The following procedure describes how to do that manually.
1. Log in to the SC as a user with platform administrator privileges.
You must have platform administrator privileges to run setfailover.
3. Log out as a platform administrator.
4. Log in to the SC as a user with superuser privileges.
You must have superuser privileges to perform the following tasks.
5. Use the /etc/init.d/sms script to stop SMS.
6. Use the /etc/init.d/sms script to restart SMS.
|
Note Note - This procedure assumes that smsconfig -m has already been run. If smsconfig -m has not been run, you will receive the following error and SMS will exit. |
8. Log in to the SC as a user with platform administrator privileges.
11. Wait until showenvironment finishes displaying all board status.
At this point you can log out and begin using SMS programs.
1. Log in to the main SC as superuser.
2. Insert the Software Supplement for the Solaris 9 05/02 Operating Environment CD-ROM into the CD-ROM drive.
3. Use the share (1M) command to share the CD across the network.
Add a CDROM entry to the /etc/dfs/dfstab file:
To propagate the CDROM image to NFS, type:
4. Log in to the spare SC as superuser.
5. Create and mount the /cdrom directory for the spare SC.
SC-I1: is the hostname specified for the SC I1 network in Step 5 of To Configure the Management Network (MAN) Using smsconfig(1M) .
6. Change to the Product installation directory:
| System Management Services (SMS) 1.2 Installation Guide and Release Notes | 816-3269-10 |
|
Copyright © 2002, Sun Microsystems, Inc. All rights reserved.